Anna is a co-founder of Adventure in You and has been traveling the world for the last 9 years. She has spent time living in Thailand, Mexico, Indonesia, and Spain and is our local expert in these areas. Her expertise on travel, gear, and building businesses have been featured on Foundr, Business Insider, Yahoo Travel, and more.
I can remember the moment very clearly.
The wind was howling and the sun was looming behind a few clouds. The air was thin (I guess that’s what happens when you’re 5,380 above sea level at Everest Base Camp). For every step I took, it felt like I was taking fifty.
After just spending the last 10 days hiking up to this point, my body was exhausted and was slowly shutting down.
Despite this, I trudged on as, after all, I was en route to the tallest mountain in the world. Thoughts of a having a hot shower, pizza, and beer plagued my mind as I shivered and powered through the last stretch before reaching Everest Basecamp.
How did I, a beach bum from the Philippines end up traversing through -15° weather just to get to a mountain?
Sure, it’s been on my bucket list for as long as I can remember, but when you’re that high up and cold, all of a sudden bucket list dreams seemed irrelevant.
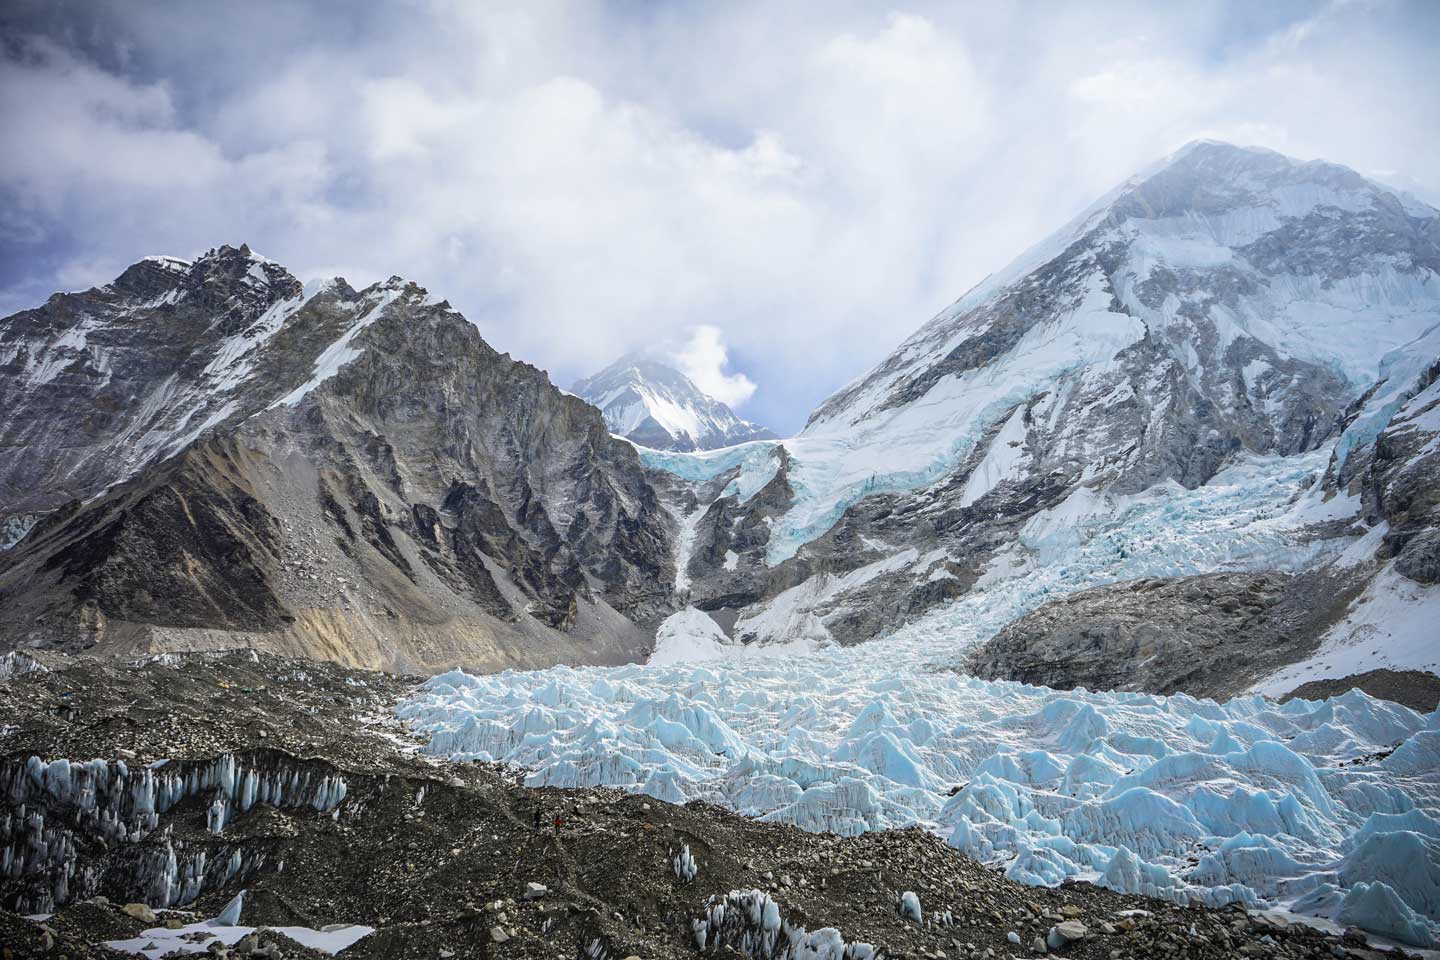
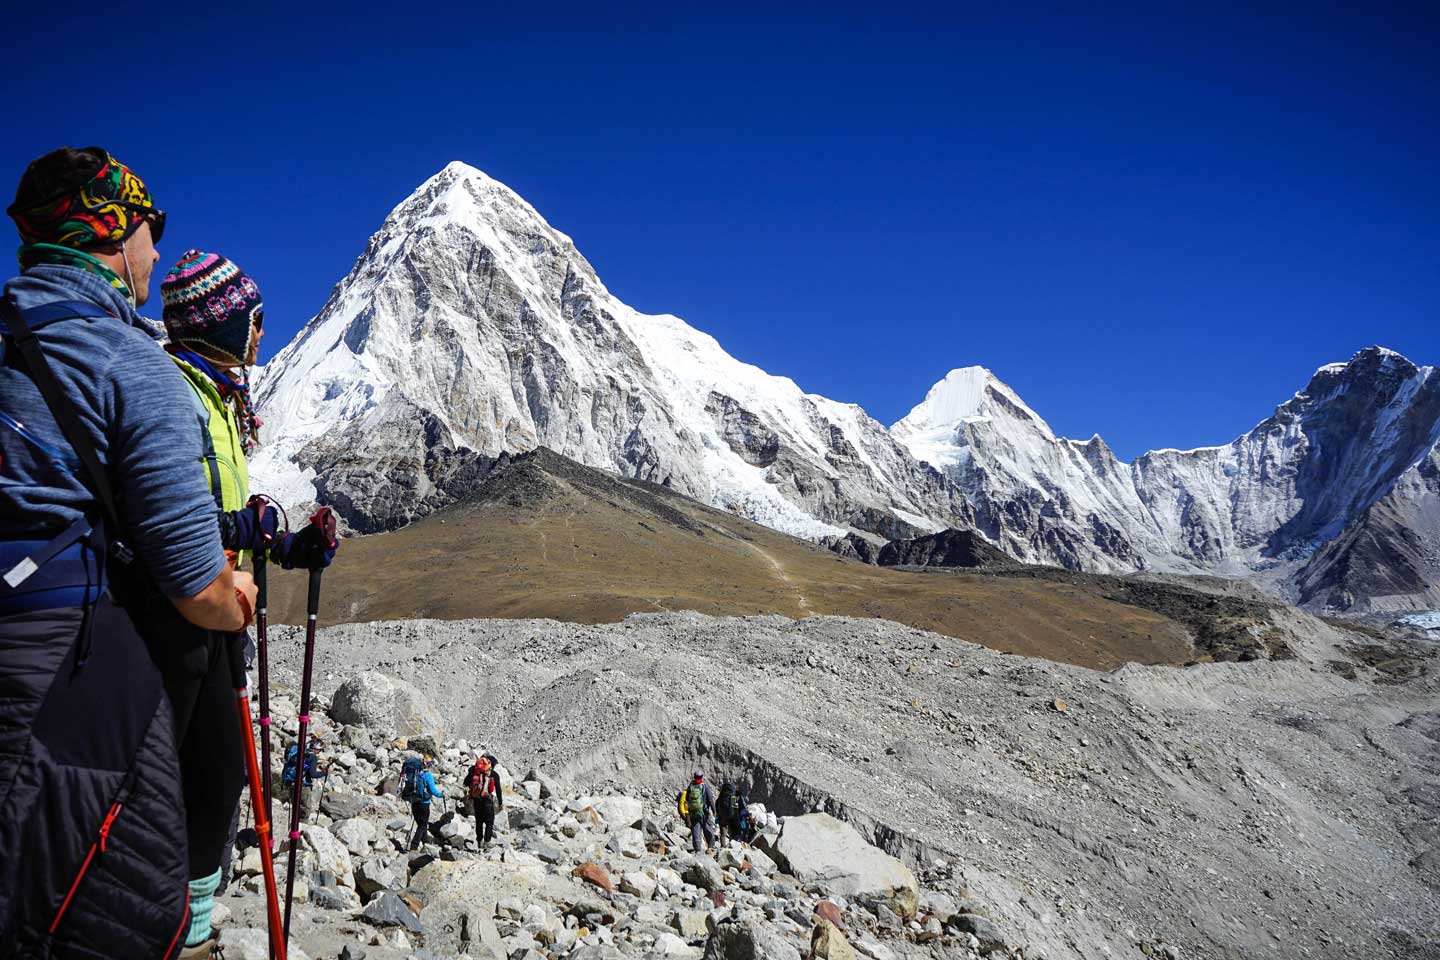
Just as I was about to start questioning my life choices, I saw the majestic Khumbu Icefalls from afar, indicating that we were finally near our destination.
Between my exhaustion and the cold, everything happened in a blur. Soon, I found myself walking across glaciers as I reached a mound of rocks and flags from fellow intrepid travelers who made their way to the base of the tallest mountain in the world.
A flurry of excitement, awe, and relief went over me as I hugged and high-fived my partner in crime, Tom. I looked around me and was humbled by the beauty of the icefalls and the unreal mountaintops of the Himalayas.
Moreover, I was amazed by the fact that I, the world’s biggest clutz made it to Everest Basecamp unscathed. (well, kinda)
To give you a bit of a backstory, Tom and I decided that since we were leaving Asia, what better way to say goodbye than by doing something epic. In line with our goal to complete the Top 50 Adventure Holidaysin the World, we soon found ourselves on a flight to Kathmandu, Nepal on what would be one of the most unforgettable two weeks of my life.
Essential: Trekking Insurance for Everest Basecamp
I cannot stress the importance of having good insurance coverage throughout this trek. Whoever you decide to go with, make sure they have full medical evacuation for high altitude within their standard package whilst it is usually a premium or an add-on with other companies.
Throughout the trek, we saw countless of people being helicoptered out due to high altitude sickness so being covered by a reputable company is a must.
The minimum price for a medical evacuation starts at $5000 so reading the fine print to make sure you’re covered in any policy that you get is highly recommended.
✨The 1 Thing We Never Leave Home Without…✨
Coming from someone who has been traveling the world for the last 8 years AND has been in the hospital 2x, travel insurance is something everyone NEEDS to get. Get a quote below!
Everest Base Camp: Organized Tour vs. Independent Trekking
When planning a trip to Everest Basecamp, the most common question that comes to mind is whether to do the trek with an authorized guide or independently. Admittedly, Tom and I are not “group tour people” as we usually like to see and do things at our own pace.
However, after speaking to a couple of people who have trekked independently, we also realized that we didn’t really have the time to plan everything ourselves. I
Trekking independently meant finding tea houses to stay (which can be difficult during peak trekking season), plotting out your route, and more importantly, being able to monitor your body for signs and symptoms of altitude sickness which is one of the primary reasons why a lot of people don’t make it to basecamp.
Although doing the trek independently was cheaper, for us it didn’t outweigh the con’s as it would require a lot more planning and organization. Given our spur of the moment decision, we just wanted to go on an adventure without having to plan everything ourselves.
In fact, during peak season (late March, April, May), the trekking lodges can get full with our guide recounting that some independent travelers have to end up spending the night in the dining room as all the rooms are fully booked.
Worst case scenario, some trekkers will have to walk to the next town in the dark if the place is fully packed.
With that in mind, we decided to partner up Explore Himalaya, a fantastic trekking company based in Nepal. I met the founder and manager during my first trip up to Nepal and decided that they were the guys perfect for the job of helping us organize our trip.
As soon as we landed in Kathmandu, we knew we made the right decision as Explore Himalaya, even had their own hotels to stay at in the major towns throughout the trek. This meant that we were able to enjoy a few perks such as not having to pay for charging our electronics, hot water for showers, or WIFI.
From start to finish, the team behind Explore Himalaya organized the entire trek for us seamlessly as they created a bespoke tour suited just for us. The guide that we had, Bal Kumar was knowledgeable about the area and has been exploring the Himalayan Mountain ranges since he was 16.
If you arrange your trip through an authorized guide/company because they know the lodge managers, although you can’t reserve a room online, most of them can phone a day before to help you book a room.
Having the peace of mind that we had somewhere to sleep along the way combined with a certified guide who knew the route by heart made a big difference during our trek.
Why We Decided to Trek with an Accredited Company: Although trekking independently is a little bit more cost-effective, doing the trek with a guide ensured us that we had booked accommodations throughout the trek as well as local support for medical emergencies or evacuations which was a lot common than we thought.
Having insight into the scenery around us throughout the trek was also a big bonus.
Everest Base Camp Trek Itinerary
In all honesty, this trip was probably one of the best things that I have done in my life giving me unreal sceneries and views to last me a lifetime. Every corner and turn showed a dramatic view of the snow-covered mountains, colorful prayer flags, quaint teahouses, and lush forests.
Day 01: Arrival in Kathmandu
The first day was spent walking around Kathmandu, settling in our hotel and more importantly, getting gear that we needed throughout the trip. The team from Explore Himalaya picked us up from the airport and checked us in our hotel which was conveniently located in the heart of Thamel.
Having come from Thailand, we needed a few pieces of warmer clothes and trekking gear to take with us.
Insider Tip: For travelers who need gear, you can easily buy/rent anything that you would need for your trek in Kathmandu. However, you will have to double check the quality of the things you purchase as there are a lot of knock-off products. With that in mind though, things I would purchase ahead of time in your home country would include a good pair of trekking boots, a good jacket, and well-stocked medicine kit.
For those that are interested in renting, a reputable and very popular store is Kalapatthar Trekking located in Thamel. Although the place doesn’t look like much, they have a variety of gear from jackets to down sleeping bags available for rent at discounted prices.
Included in our EBC trek was a guided tour of the best things to do in Kathmandu City. Having explored the city twice now, I was familiar with a few of the sights but still enjoyed the local commentary that our guide gave.
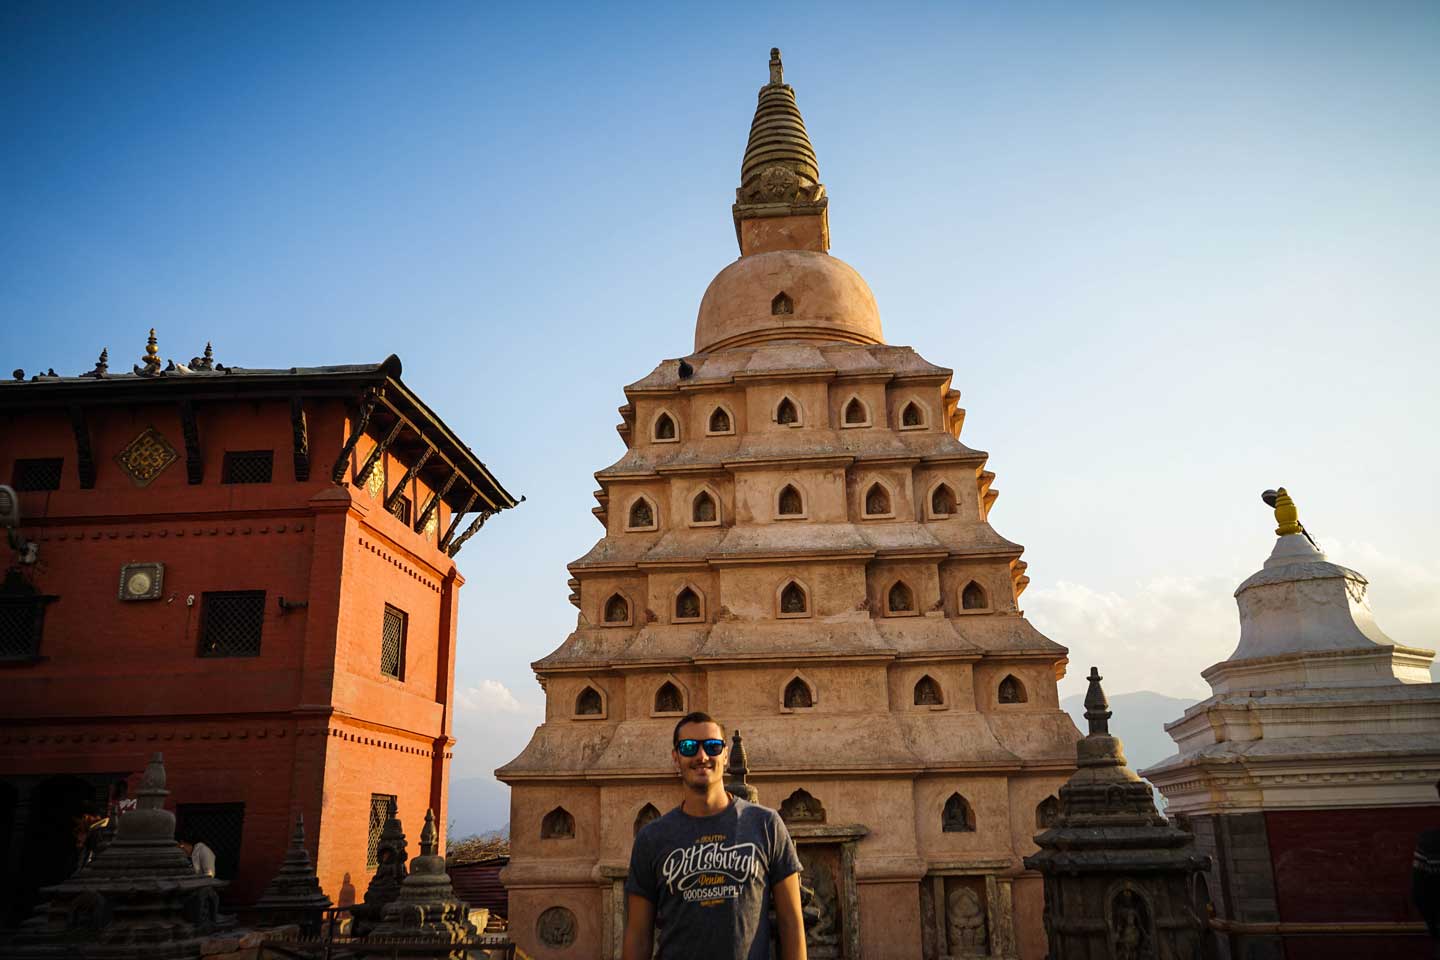
This guided tour brought us to Boudhanath, Pashupatinath, and Durbar Square which are all fantastic places to see to get a glimpse of the incredible Nepali culture.
Editor’s Note: Want to Know How Much It Costs to Trek to EBC? Check out our complete Everest Basecamp Trek Cost guide
Trekking Day 1: Trek from Lukla(2853m) – Phakding (2600m)
EBC Trek Distance: 8km (4-5 hours)
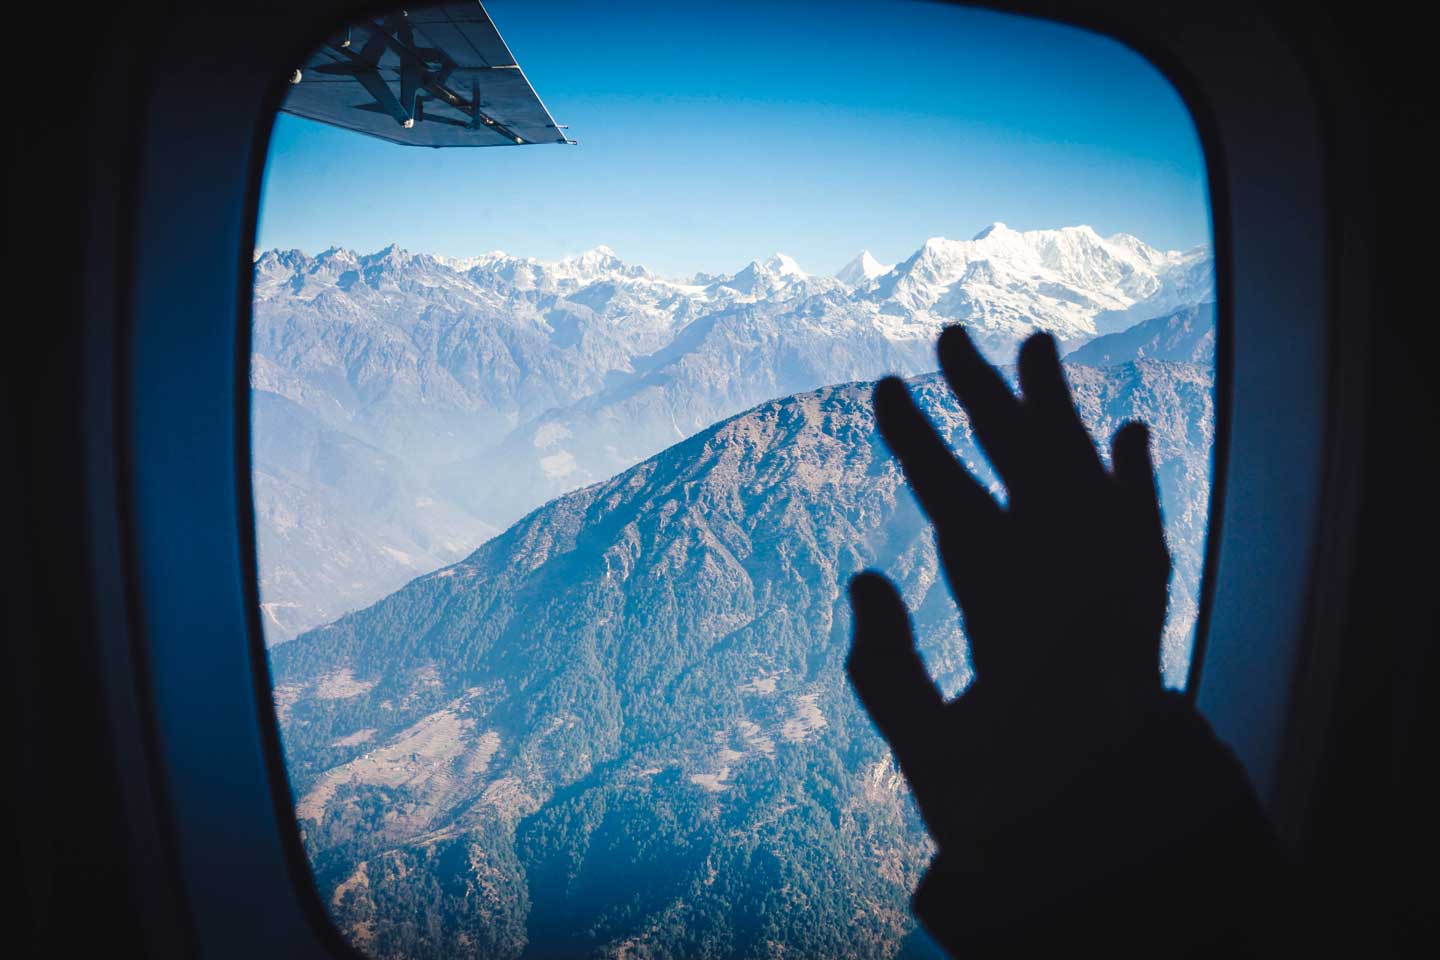
The day started off with us catching a flight from Kathmandu to Lukla which is known as the gateway to Everest. Dubbed as one the world’s most dangerous airports due to the short runway, the flight to Lukla involves a tiny propeller plane that cruises in between towering mountains. If you like planes like we do, this flight was nothing short of amazing! If you’re terrified of smaller planes…bring some sweets and consider taking some dizziness medicine to help!
Before you start your trek, I recommend stopping by the Everest Inn: Hotel Shangrila located right outside the airport. The manager is a lovely guy who will happily recommend where to stay along the way as well as how to best go about your trek.
As mentioned, throughout our trip, we stayed in the Everest Inn chain of hotels owned by Explore Himalaya and always had a blast. We were always welcomed with a warm cup of tea plus the food was good and the prices were reasonable.
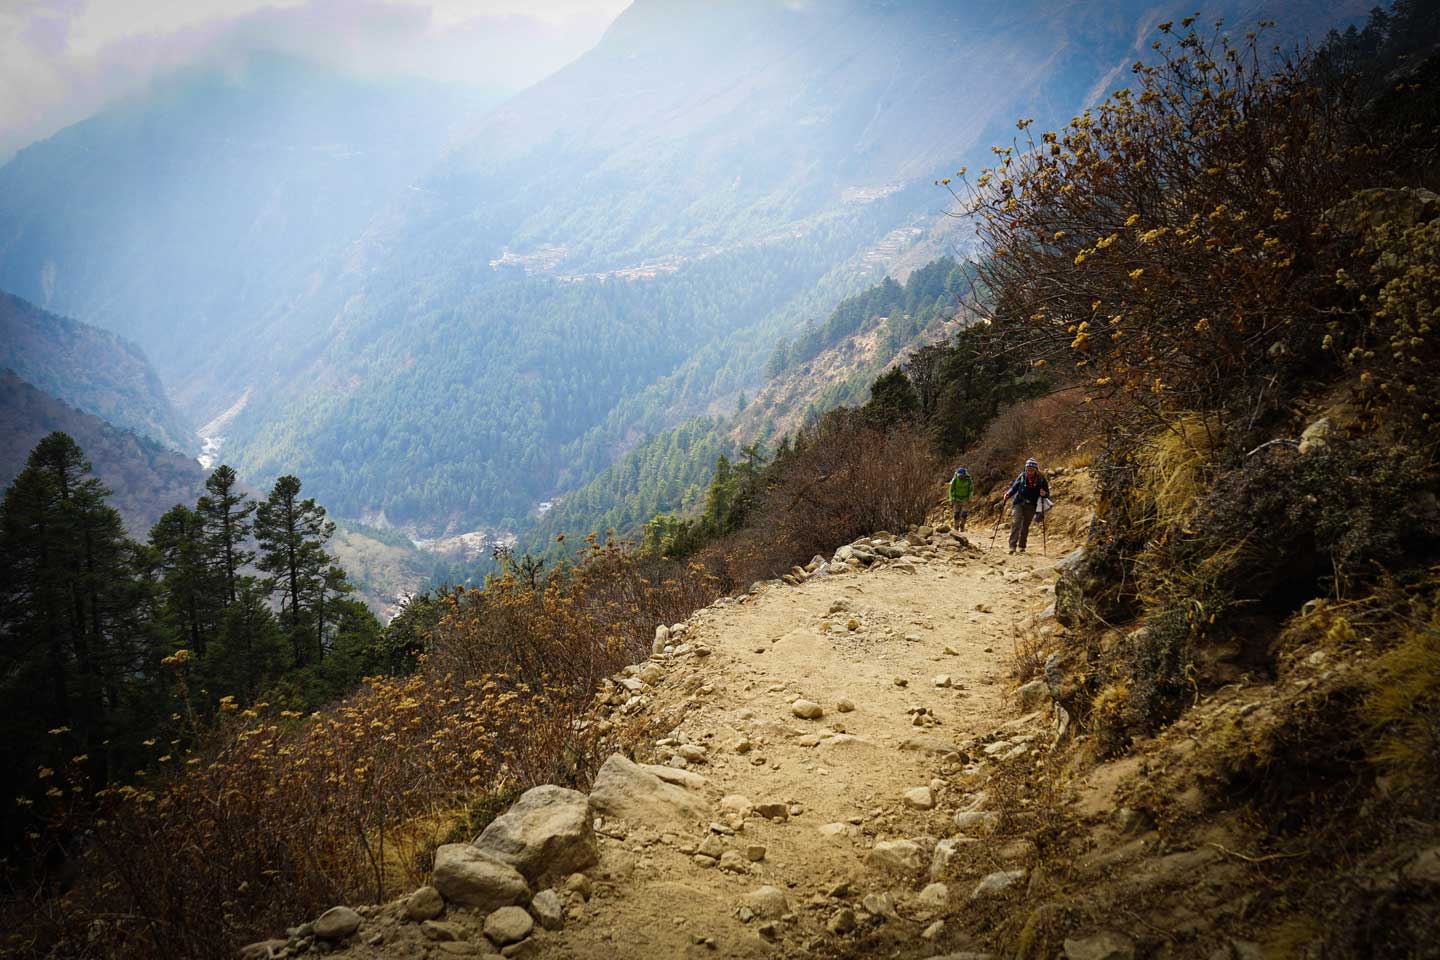
The first day of our EBC trek was actually surprisingly easy since we were descending for the most part. Although we encountered some steep bits, the entire trek was very manageable. For fast trekkers, you can probably reach Phakding in 3-4 hours.
Together with my partner Tom, our guide, and a porter, we soon reached Phakding after getting our first taste of the beautiful scenery which involved crossing a few suspension bridges all while we enjoyed the beautiful trees and forested areas along the walk.
Where to Stay in Phakding: Everest Inn: Eco-Sherpa Home
Insider Tip: Sit on the left-hand side when boarding the plane to make the most out of the stunning aerial flight over the Himalayas. Coming back from Lukla, sit on the right. We recommend choosing a seat at the end of the plane as the seats near the pilot get blocked by the propeller.
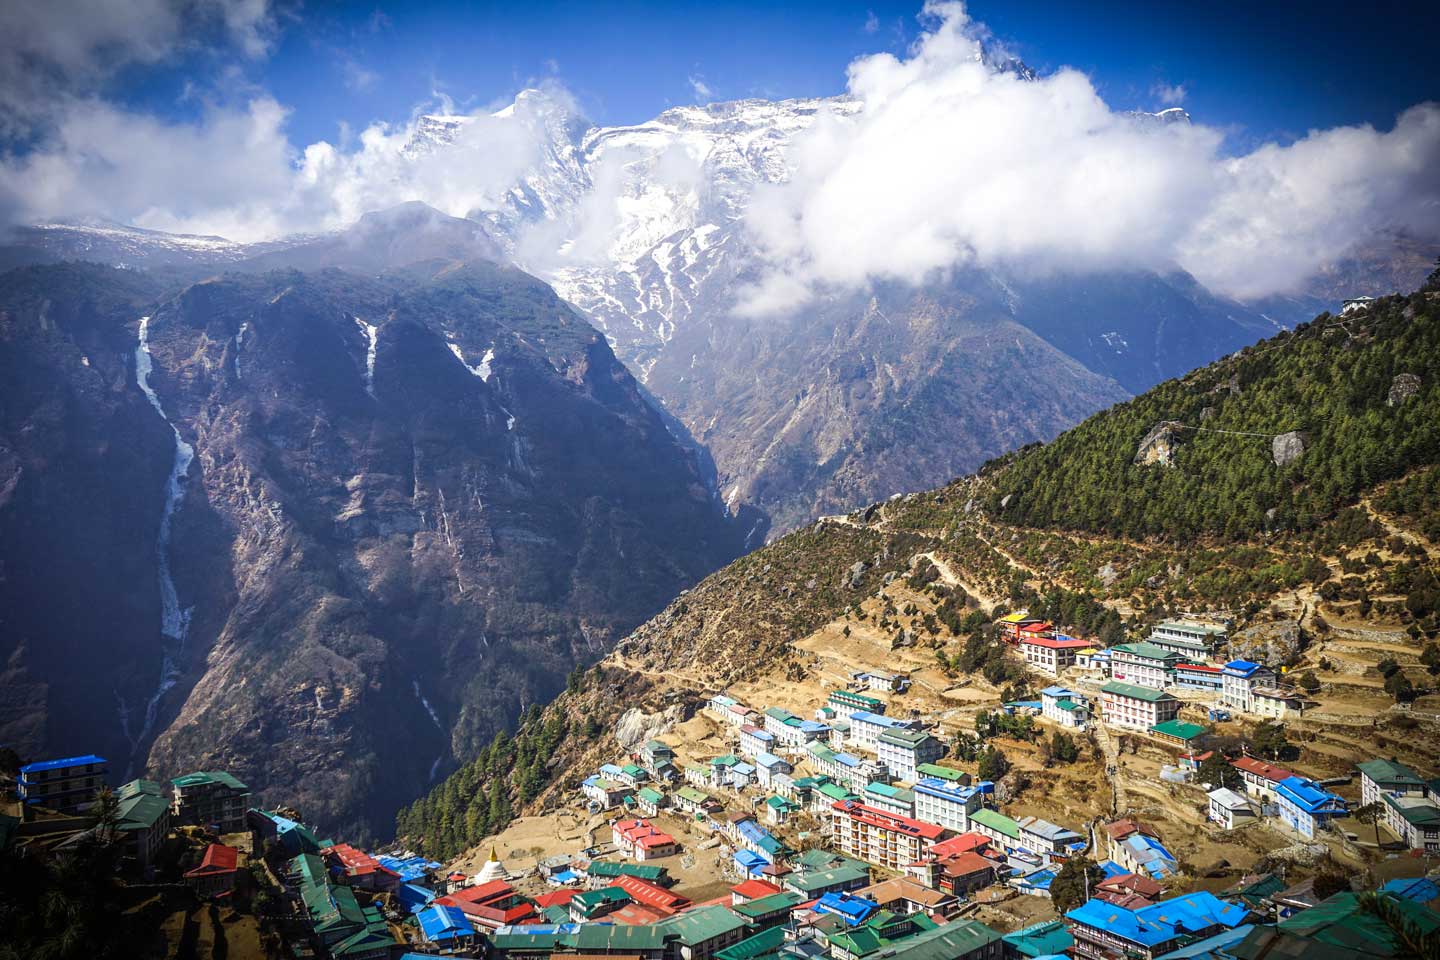
Trekking Day 2: Phakding to Namche Bazaar (3450m)
EBC Trek Distance: 11-12 km (6-7 hours)
Where to Stay in Namche Bazaar: Everest Inn
After reading a few reviews, it’s no secret that the second day of the Everest Basecamp Trek is pretty much a killer. As if to make up for the easy first day, the second day starts off moderately easy as we make our way along the banks of the Dudh Kosi River, however, after you reach the last suspension bridge, it’s around 3 hours or so of uphill hiking.
Before you reach Namche Bazaar, you will reach a checkpoint where you have to present your permits etc. Since we were going with an accredited guide, he took care of everything for us so we used this time to rest before powering on the grueling last few km. of uphill climbing.
We arrived at our tea house pretty exhausted so we quickly gobbled up some garlic soup (recommended to help combat altitude sickness) and called it a night after spending a couple of hours taking in the incredible views.
Trekking Day 3: Acclimatization in Namche Bazaar
EBC Trek Distance: Dependent on which viewpoints you hike to but in total, you should only be walking around 2-3 hours max.
Where to Stay in Namche Bazaar: Everest Inn
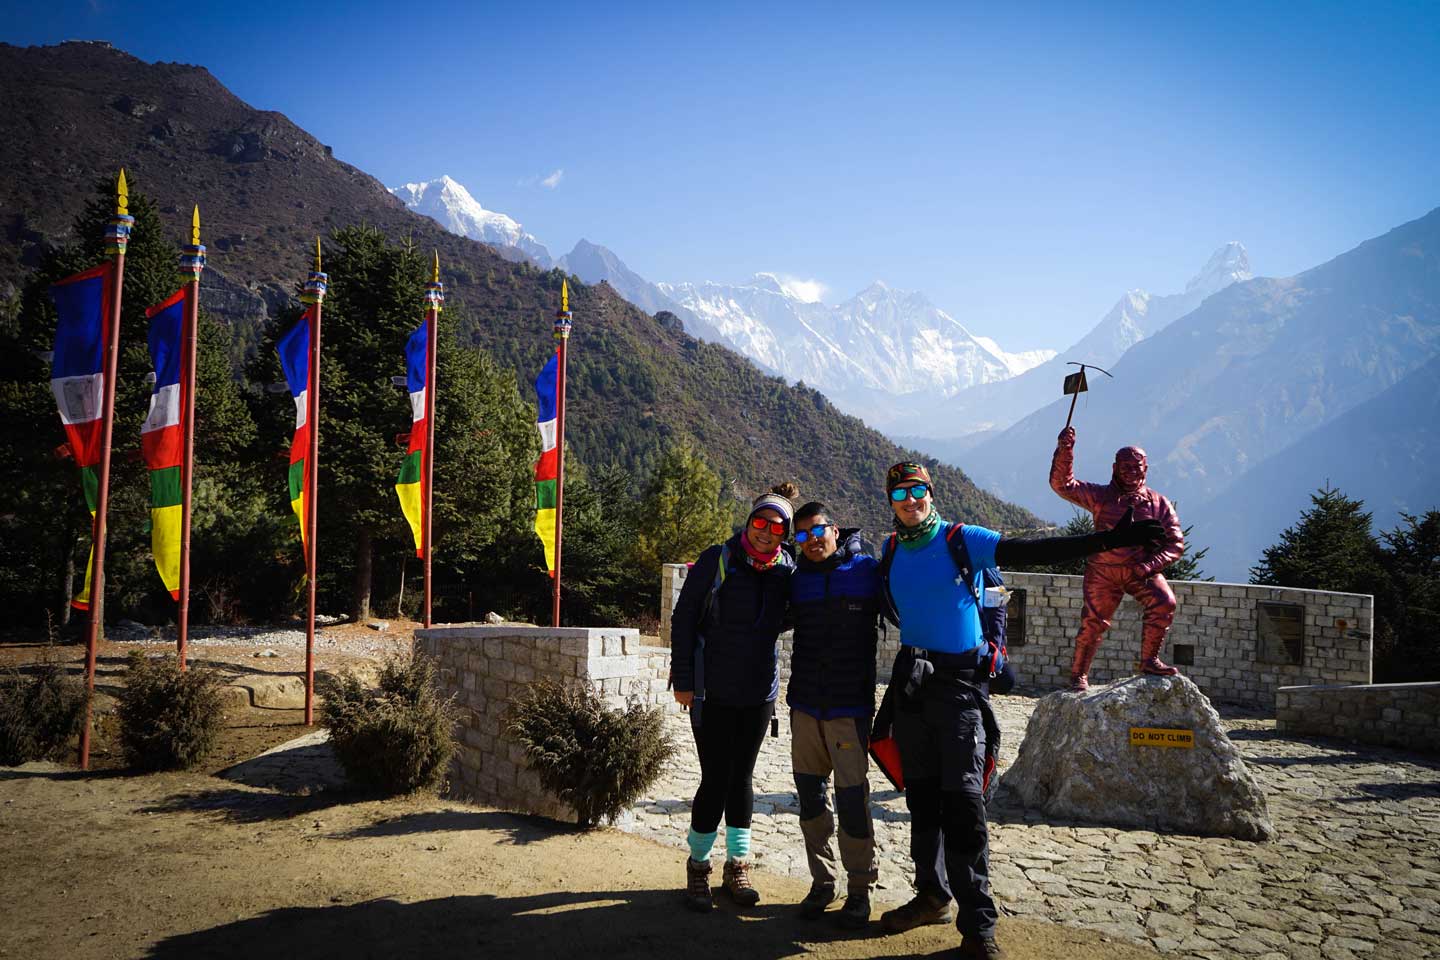
Acclimatization days are important and shouldn’t be skipped. These days are designed to help your body adjust to the altitude. Wanting to catch our very first glimpse of Everest, we woke up relatively early and made our way to the Sherpa Museum.
The trek isn’t too difficult but I do admit getting winded after taking my first few steps as we left our tea house in Namche as my body still wasn’t used to the air.
I highly recommend walking around the Sherpa museum as there were loads of interesting artifacts about the Sagarmatha National Park and previous Everest expeditions. Just outside the museum, you can also see a large statue of Tenzing Norgay, the famous Sherpa who reached Mt. Everest summit together with Edmund Hilary.
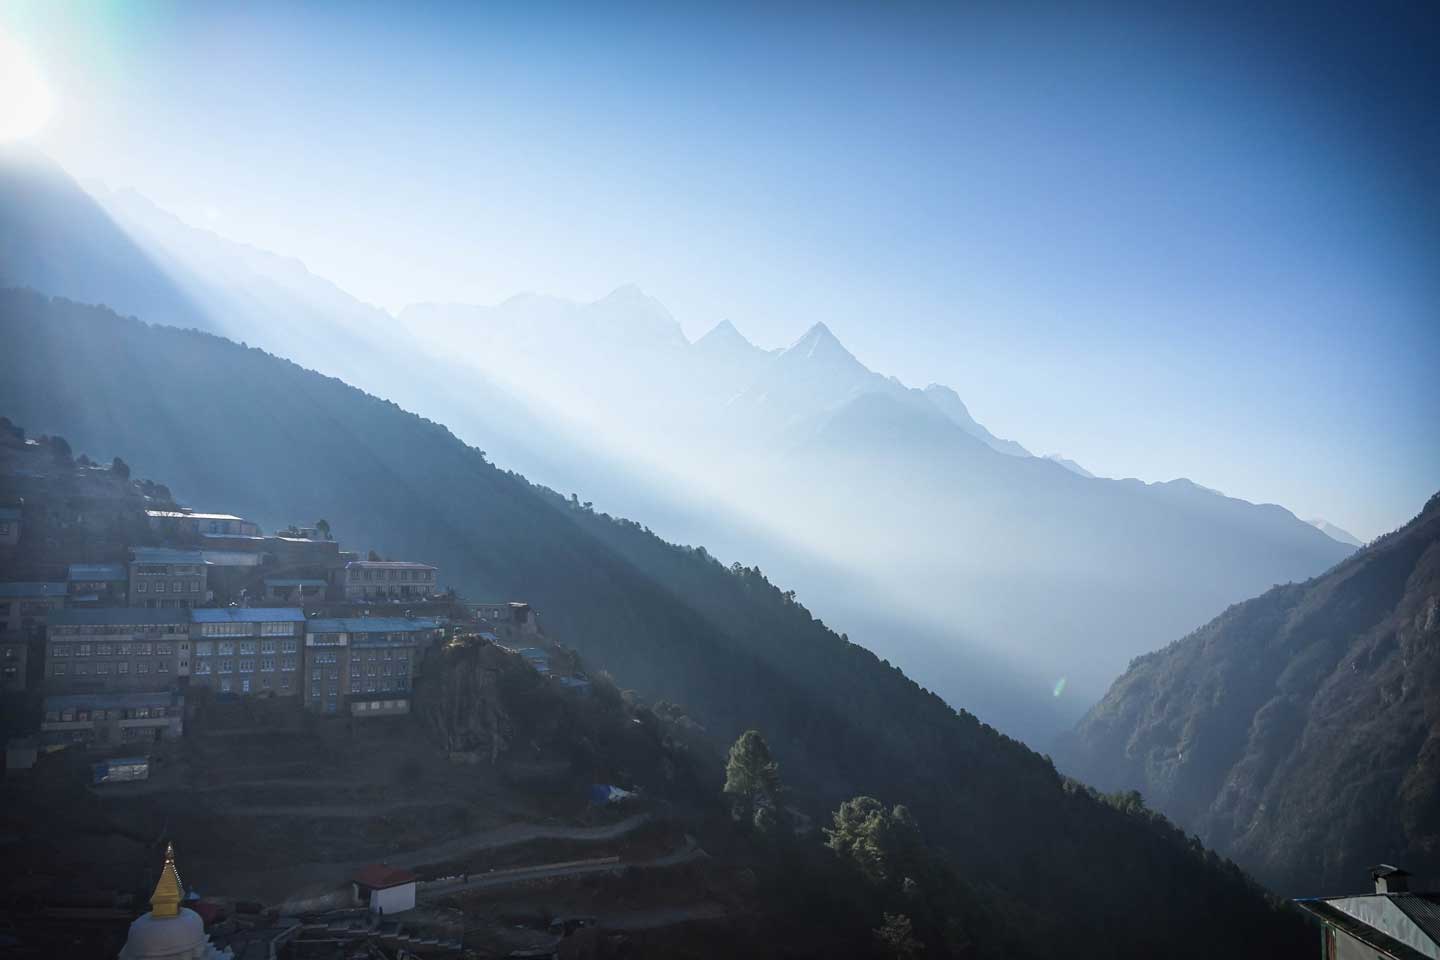
We decided to skip hiking up to Sherpa Village Lodge and went to a monastery instead. After that, we spend the rest of our time walking around Namche Bazaar, enjoying the variety of restaurants, bars, stores, and coffee shops.
After receiving a tip from other blogger friends, we recommend going to Himalayan Java Cafe to have some chocolate walnut brownie. It is TO DIE FOR. Namche Bakery also has heaps of baked goods worth trying.
Insider Tips: Aside from shopping around, if you arrive in Namche Bazaar during the weekend, you might catch the Sherpa Market where locals from surrounding villages come and trade local goods. Apart from this, we also recommend going to Liquid Bar where they project daily movie screenings as well as checking out the many coffee shops around Namche.
Trekking Day 4: Namche Bazaar-Devoche (3820m)
EBC Trek Distance: 12km (6 hours)
Where to Stay in Devoche: Everest Rhododendron Lodge
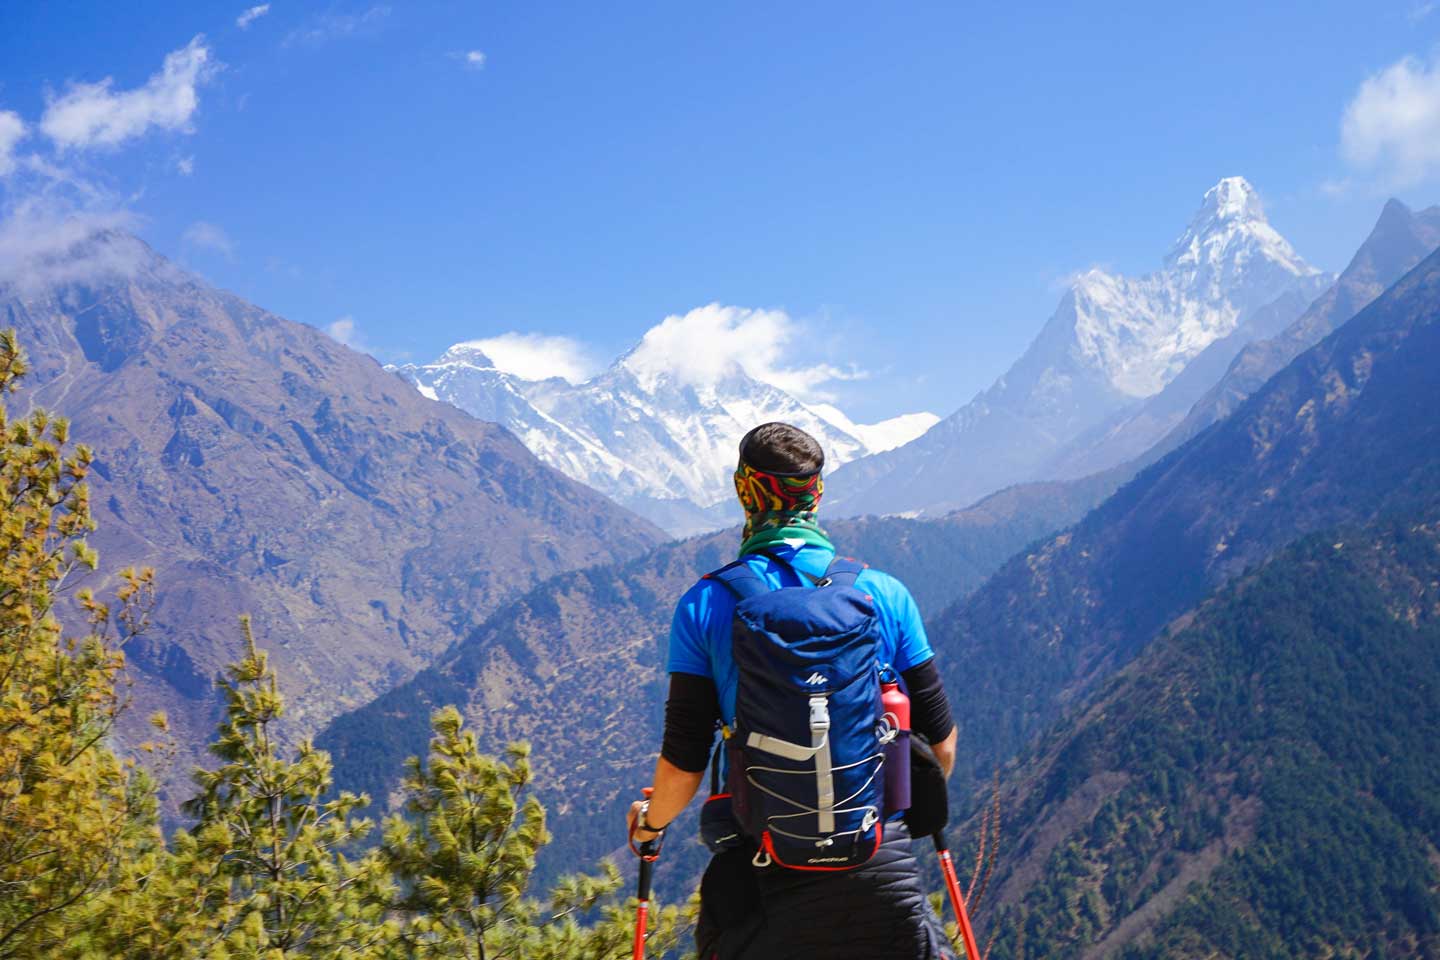
After getting some much-needed rest in Namche Bazaar, we carried on with the rest of our trek as we made our way to Tengboche. Right after you leave Namche Bazaar, you will encounter some pretty unreal cliffside views with a path snaking around the multiple bends giving you incredible views of the impressive peaks in the Khumbu Region: Everest, Lhotse, Nuptse, and Ama Dablam.
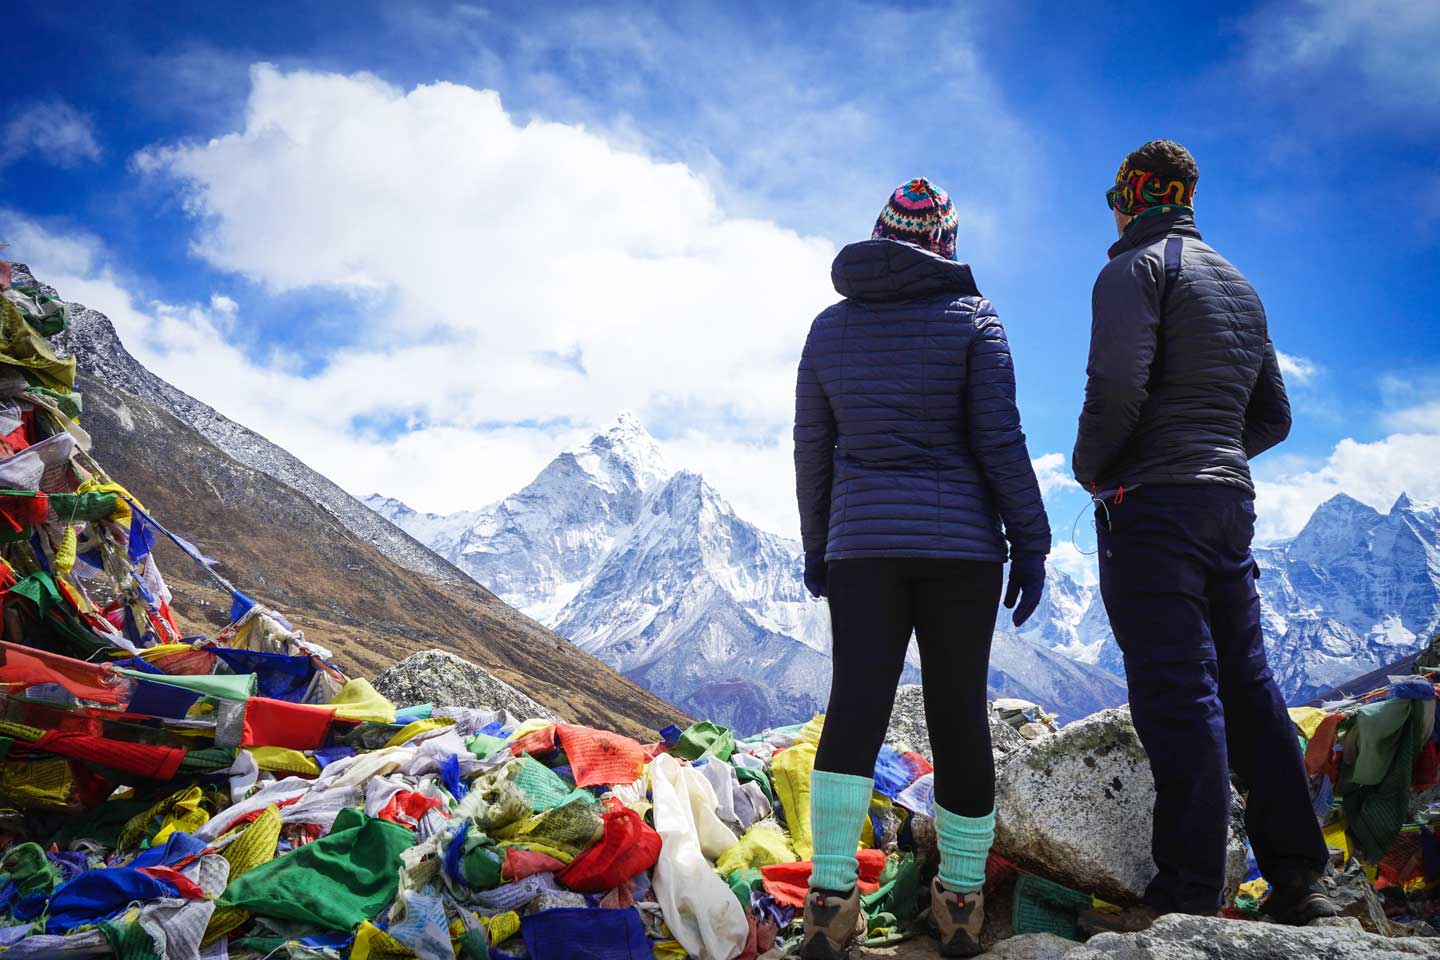
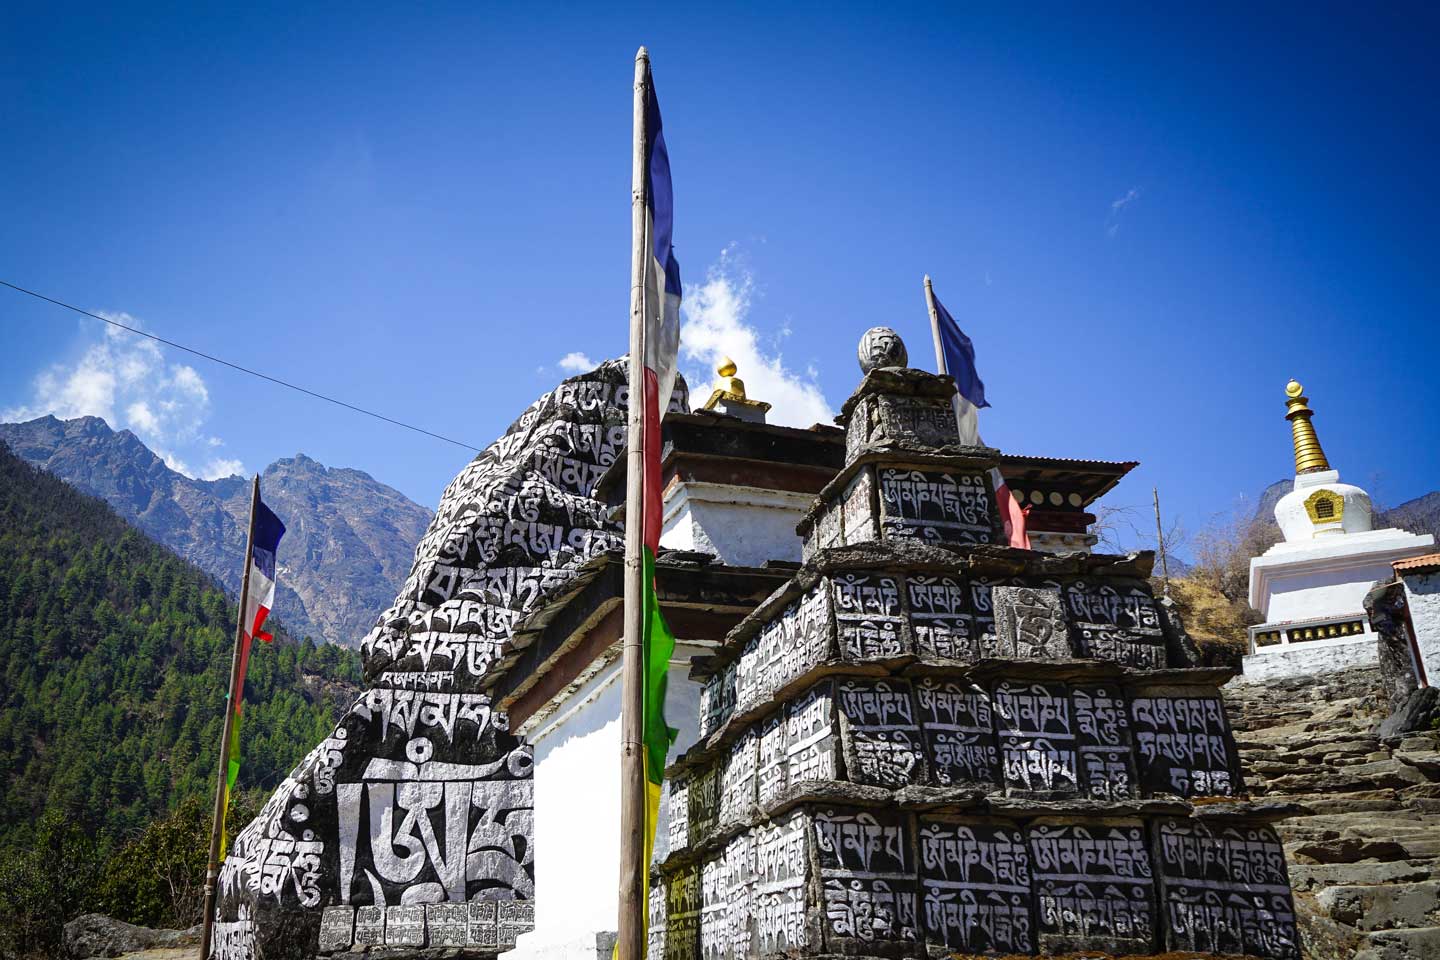
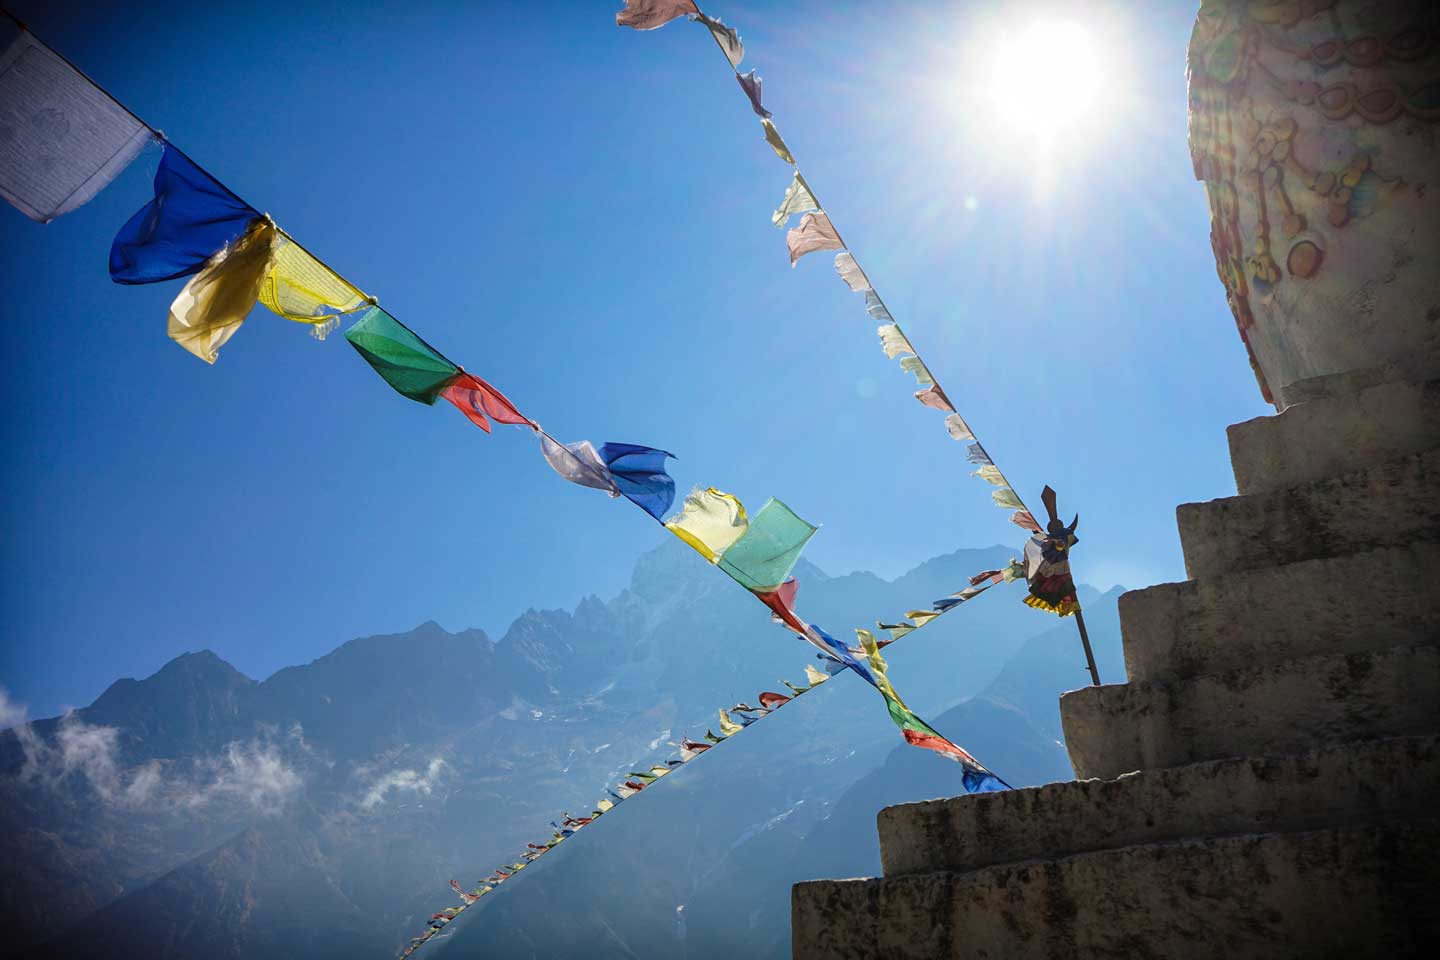
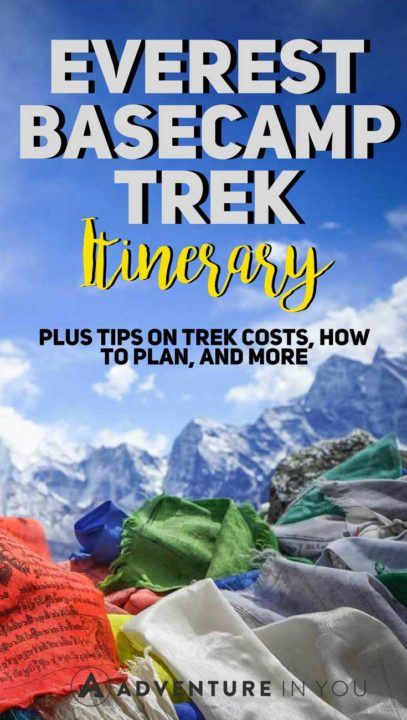
Along this path, you will see plenty of picturesque Chortens (stupas) which have prayer flags hanging around them. If ever you see one of these symbolic monuments, as a sign of respect, walk around it in a clockwise direction.
En route to Devoche, make sure you stop by the famous Tengboche Monastery which is a popular place of worship where Everest expeditions stop by to offer a few prayers for safe passage to the mountains.
Trekking Day 5: Devoche-Pheriche (4252m)
EBC Trek Distance: 12km (6-7 hours)
Where to Stay in Pheriche: The White Yak
As you can imagine, at this point, the oxygen in the air is getting thinner and thinner, making it difficult to breathe. The forested area near the start of the trail is the last that you will see because as soon as you reach Pheriche, the landscape starts changing drastically as it turns more barren as trees and other types of foliage cannot survive in this temperature and elevation.
After five days trekking for almost 7 hours a day, I was starting to feel the fatigue. From Devoche (or Tengboche, depending on where you stay) we made our way to Pheriche. Some trekkers opt to stay in Dingboche which is just on the other side of the valley.
Trekking Day 6: Acclimatization in Pheriche
EBC Trek Distance: Dependent on which viewpoints you hike as there are three. The first point takes about an hour, while the second and third takes you up higher. In total, you should ascend and descend around 500m.
Where to Stay in Pheriche: The White Yak
Similar to the acclimatization day in Namche Bazaar, we highly recommend everyone to take the time to stop in either Pheriche or Dingboche on the way up. We woke up a little later than usual and set off for a short hike to a viewpoint.
To those that aren’t familiar with the concept of acclimatization, this is when you hike to a higher point then go down (hike high, sleep down) to help your body get used to the altitude.
The acclimatization hike should take around 2-3 hours and should take you around 4,900m. Somewhere along the hike, I started feeling a bit woozy as the oxygen got thinner and thinner.
I was slowly making my way up with my guide but decided to stop midway as I was feeling nauseous and ill. The altitude was getting to me and I was feeling very lightheaded. Tom proceeded to carry on but also stopped a few meters away from the 2nd peak due to lightheadedness.
Our guide told us that some people push their limits and force themselves to reach the highest viewpoint (about 3 hours up) but end up being ill afterwards and needing evacuation. Bottom line is to listen to your body as altitude sickness is no joke.
Ironically, we met a person who said he was trekking with a group who insisted on skipping the acclimatization day. He ended up with altitude sickness and ended up staying behind while another member of his group was evacuated via helicopter right as they reached the next stop.
As soon as we finished our trek, we headed back to our tea house where we took shelter as it had just started to snow. Within a couple of hours, the once barren landscape was now transformed into a winter wonderland. We spent the rest of the afternoon huddled by the fire, drinking hot tea, reading, and walking around the snow covered areas to take photos.
Dangers of Altitude Sickness: Altitude sickness, also known as AMS (Acute Mountain Syndrome) is one of the major challenges that most trekkers face. In fact, throughout our trek, every day, we would see at least 2-3 helicopter evacuations from people who needed immediate care. Symptoms of AMS: Dizziness, fatigue, loss of appetite, headaches, difficulty sleeping, vomiting. The only real cure for altitude sickness is to go lower, giving your body time to adjust and recover.
Trekking Day 7: Pheriche – Lobuche (4930m)
EBC Trek Distance: 12 km (6-7 hours)
Where to Stay in Lobuche: Peak XV Lodge
At this point, I was cold, tired, and was badly in need of a shower which made me the slowest trekker ever The nights are spent mostly huddled up in our -20° sleeping bags as the tea houses provided little insulation. We woke up bright and early and started making our way through the snowy landscape towards the Khumbu Valley.
After stopping at Dugla for lunch, there is a grueling uphill section right over the Thukla Pass where you will find the Everest Memorial Site.
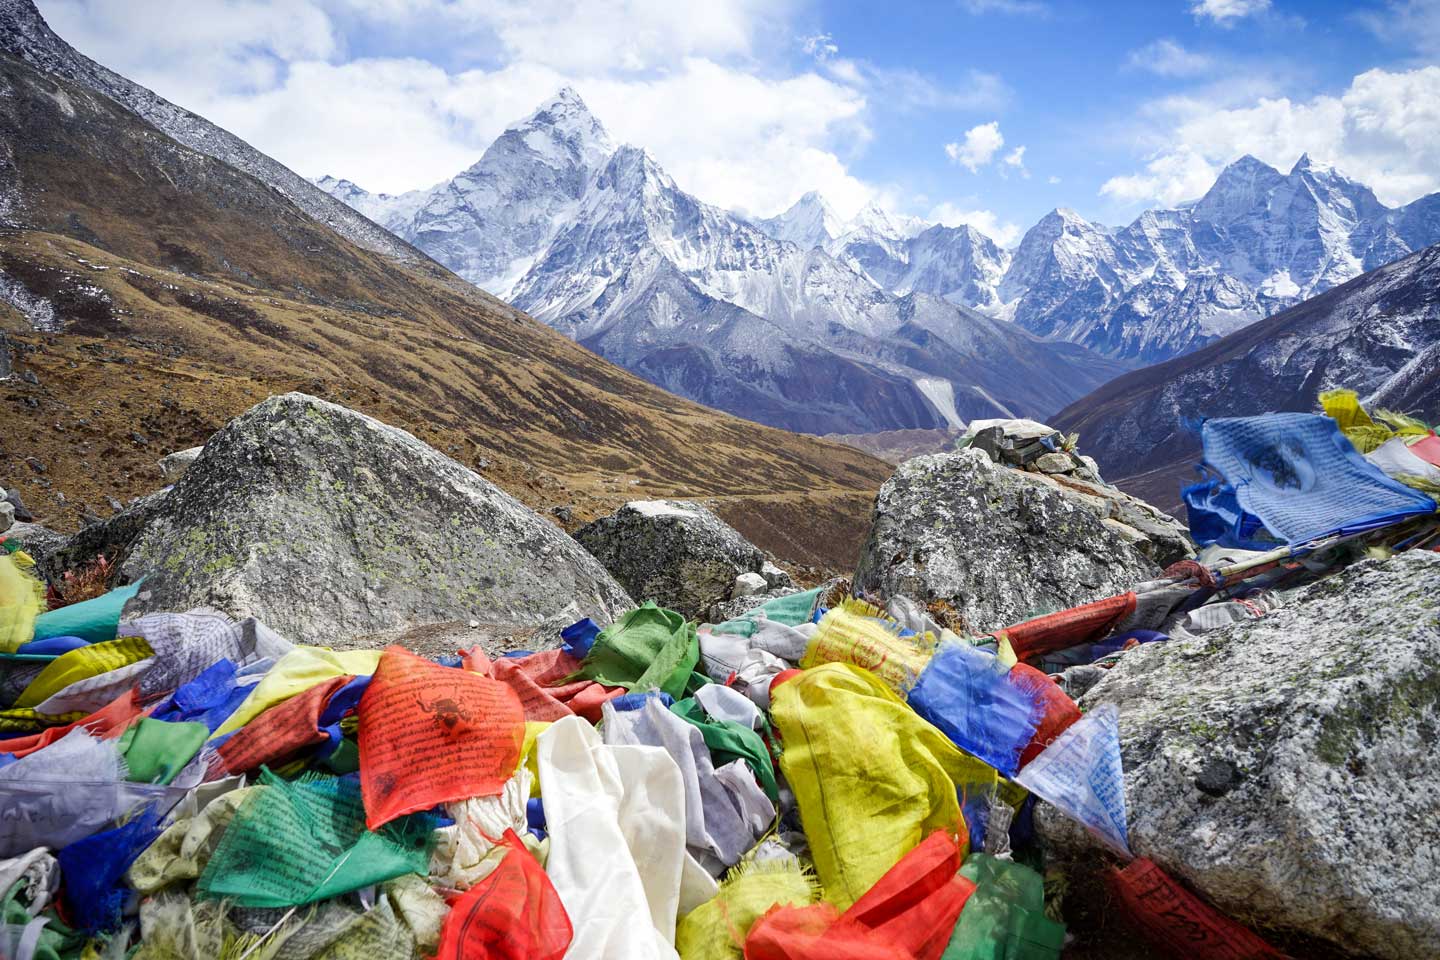
Here, you can find stone memorabilia, prayer flags, and chortens to honor the people who lost their lives up in the mountain. The views here are incredible but seeing all the graves and stone memorials is a humbling experience as it reminds you to respect the mountain and mother nature as things like avalanches can happen in a split second.
As for me, I started feeling the altitude and the cold. When I got to Lobuche, I barely caught any sleep as I had a pounding headache and was feeling pretty rough. The next day, we were supposed to reach Everest Basecamp and although I was excited, I was also really really tired. The last few days have taken a toll on me and I wasn’t feeling in tip-top shape.
Trekking Day 8: Lobuche – Gorak Shep (5180m)
EBC Trek Distance: 5 km (4 hours)
Where to Stay in Gorak Shep: Buddha Lodge
I woke up this day with almost little to no energy but forced myself to get out of my sleeping bag, bundle up, and start trekking. According to our original itinerary after reaching Gorak Shep, we were to drop our bags, have lunch, then begin our 5 hours (roundtrip) trek up to Everest Basecamp.
It took us about 4 hours to get to Gorak Shep and by this point, my body was just shutting down. I tried eating some food but couldn’t really stomach much. Armed with a small day bag and a pocket full of chocolates for energy, we started making our way to Everest Basecamp as we traversed through a mix of rubble, ice, and uneven pathways.
I don’t really know what happened from this point onwards but my body just felt like it was shutting down. I was stumbling in the cold and was barely thinking straight. I wanted to badly to make it to Basecamp but was also beyond exhausted.
Thankfully, Tom was there with me to talk some sense into me and made me turn back. As soon as we got back to our lodge in Gorak Shep, I collapsed into my sleeping bag and slept for a couple of hours after taking some Diamox.
When I woke up, I found out that about 40% of the people in our tea house didn’t make it to Basecamp either. A lot of people turned back and a few were trying to get medical evacuation. Seeing this made me even more thankful that Tom was there to turn me around! After some food and lots of tea, I went back to bed determined to make it to Basecamp the next day.
Important: The usual itinerary is Lobuche – Gorak Shep – Everest Basecamp – Gorak Shep. Most people then use day 9 to go up to Kalapatthar (5643m) for sunrise before heading down. The climb up Kalapatthar is pretty steep but for those that do get to do it, you will get rewarded with incredible views.
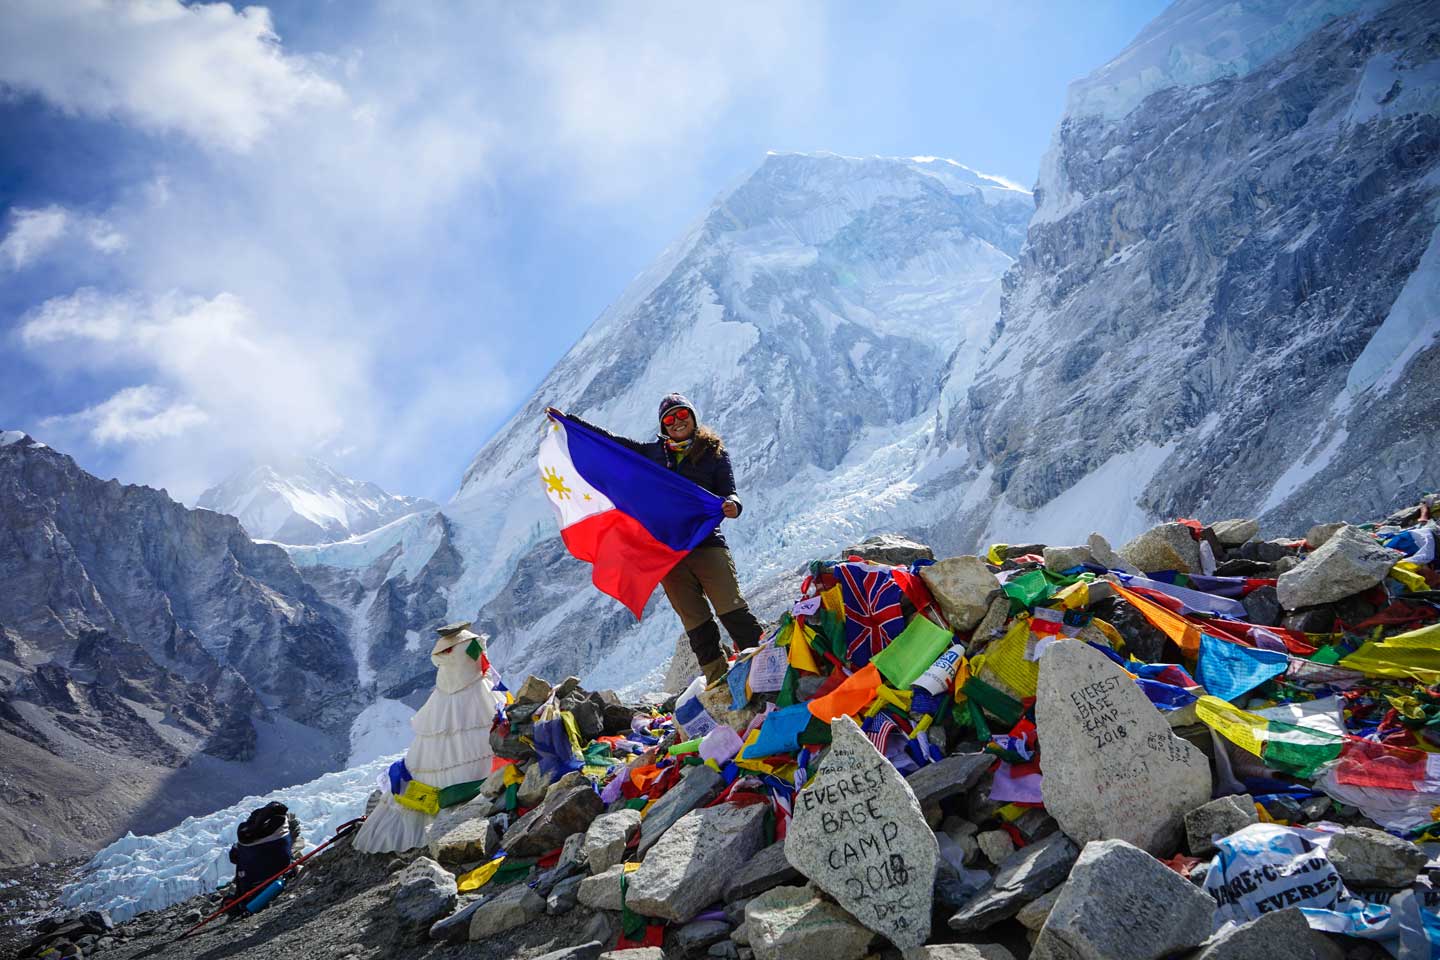
Trekking Day 9: Gorak Shep- Everest Basecamp (5380m)- Pheriche
EBC Trek Distance: 18 km (8-9 hours) If you’re coming from Gorak Shep after climbing Kalapatthar, it should take around 7 hours.
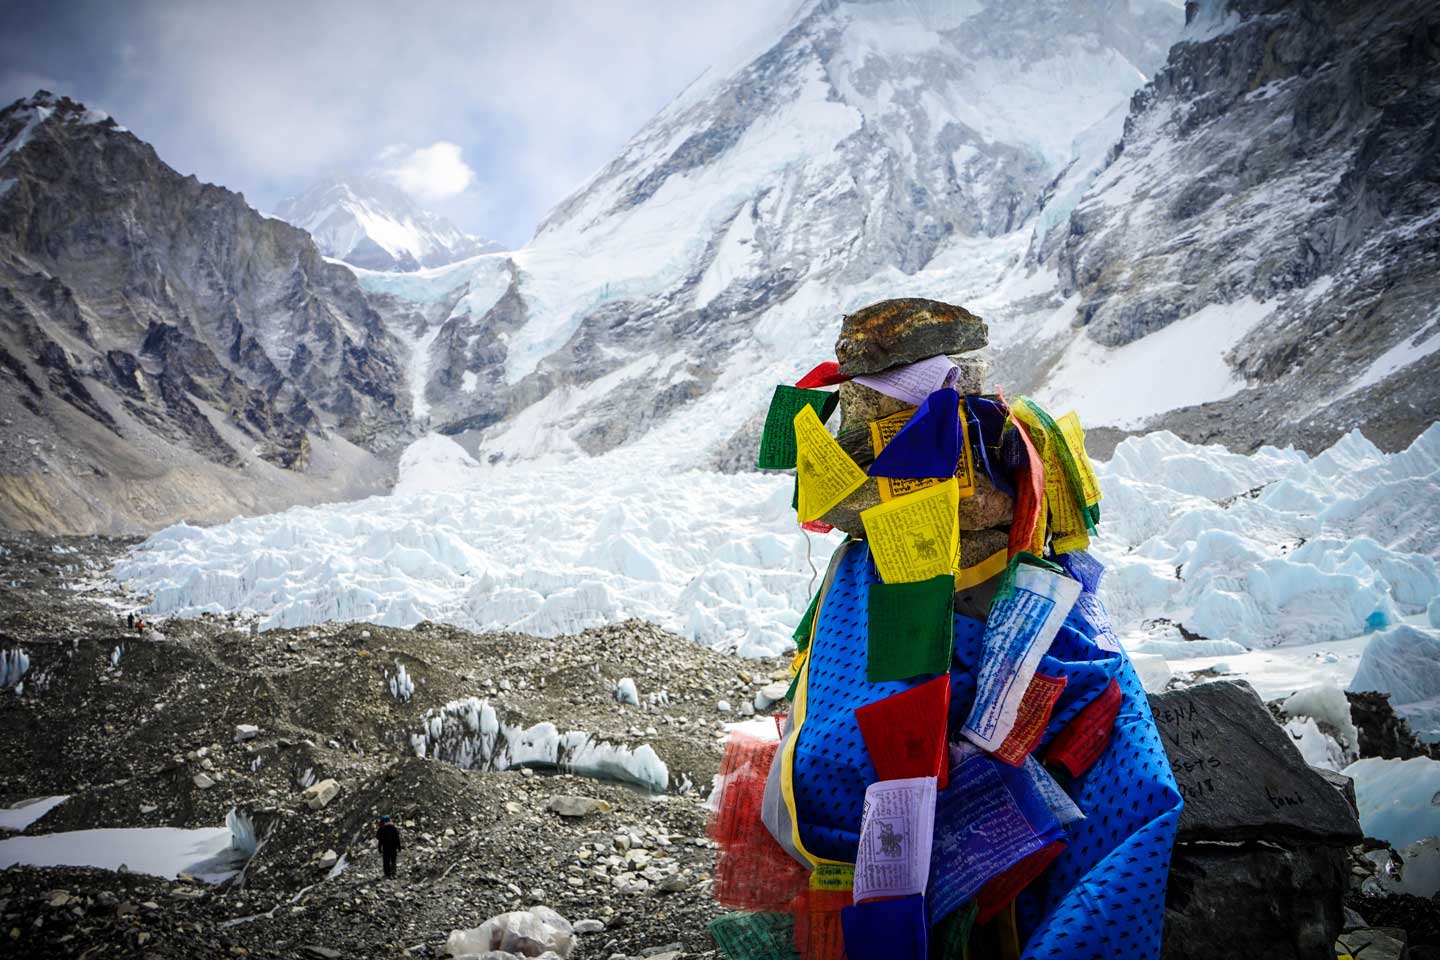
I woke up the next day feeling a tad bit better than yesterday so we began our ascent to basecamp. Although the scenery was pretty barren, it was still pretty spectacular being surrounded by all those mountains and glaciers. Soon, we caught our first glimpse of the infamous Khumbu Glacier which was a pretty unreal sight.
Fun fact: because Everest Basecamp is set up every year, the location changes as the glacier and surrounding areas move. This means that the direct path towards EBC varies greatly depending on the glacier path.
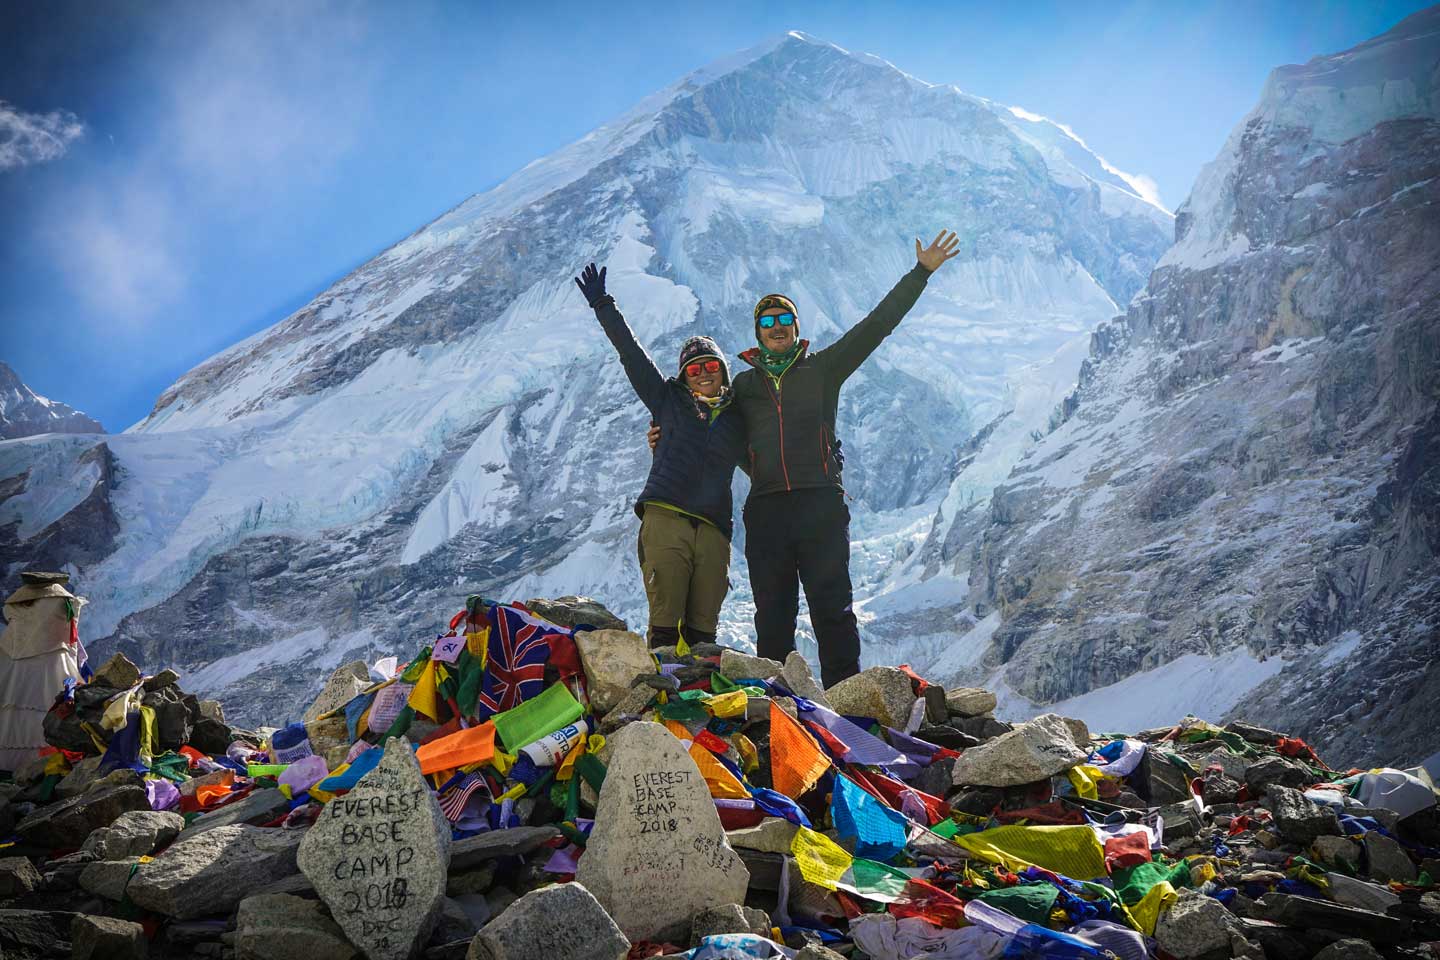
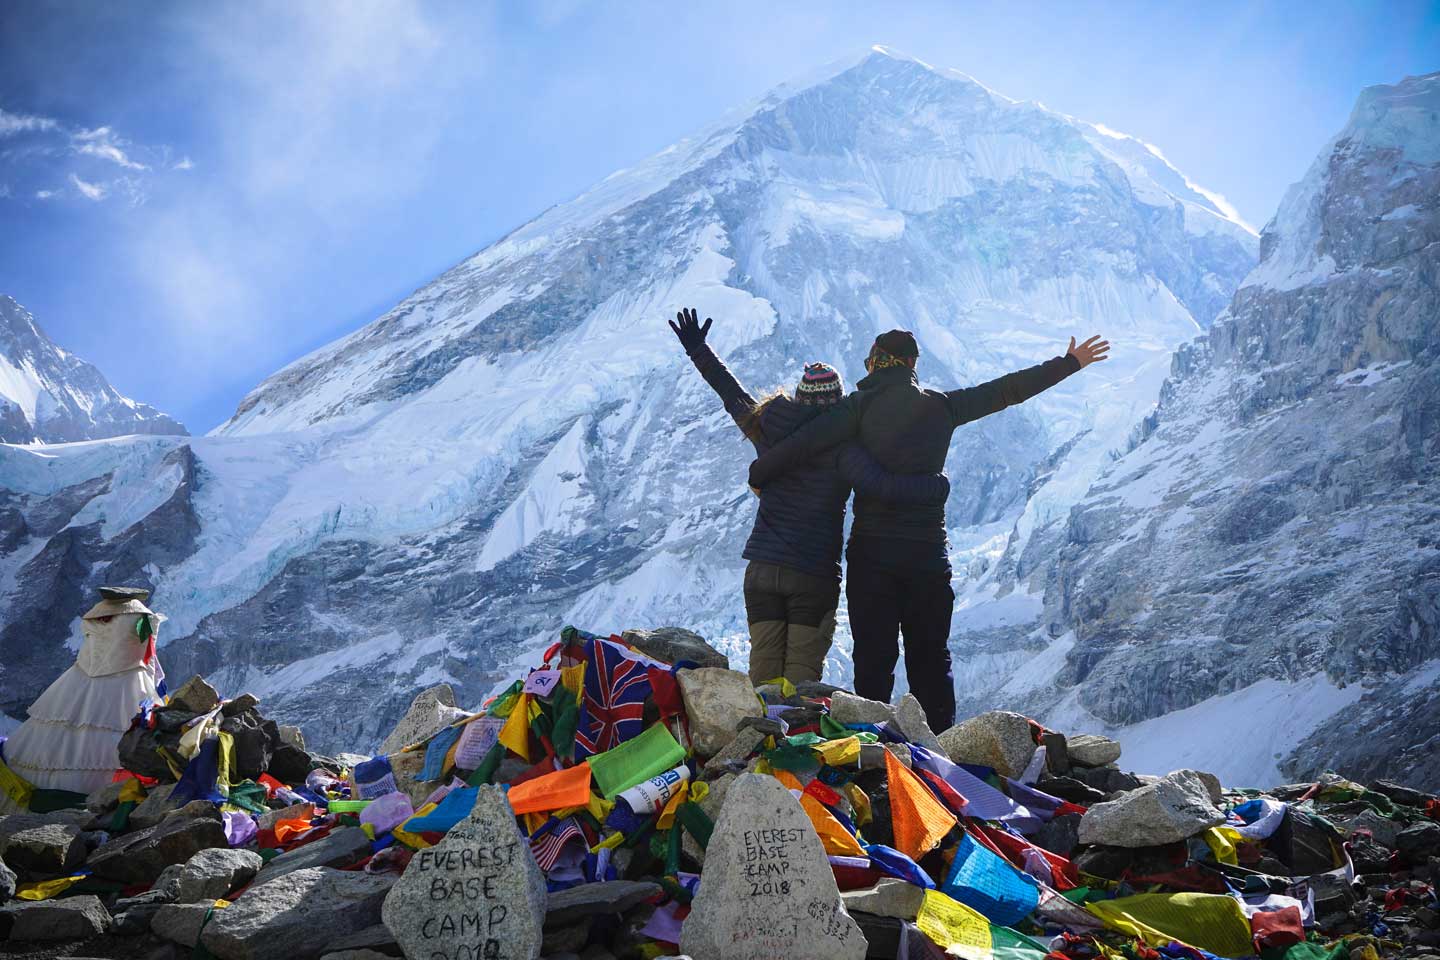
After what felt like forever, we finally reached Everest Basecamp as we saw the pile of rocks and flags left behind by other travelers. All of a sudden, all feeling of fatigue and exhaustion was replaced by excitement. Between the incredible views and the massive feeling of accomplishment of completing something which I set out to do, both Tom and I were over the moon that we made it.
Because we left early in the morning, we had Basecamp all to ourselves which was pretty amazing. We were also pretty early for the season so we didn’t see any expedition tents set up. It was like a silver lining as people who went the afternoon told us that it was pretty busy at the top with large groups of trekkers so most of them had to take turns taking photos by the rocks.
After we did a happy dance, made a short video for our families with the obligatory “Look Mom, I’m on the base of the top of the world”, we began our trek down.
Unfortunately, the Diamox that I took the day before started to give me stomach acidity and was making me nauseous. The hike down to Pheriche was a sad mix of me mustering enough strength to walk down, mixed in with some vomiting.
I couldn’t bring myself to eat so I was running on water, electrolytes and the occasional power bar. To cut the long story short, the next two days felt like hell but as I descended, I slowly started feeling better.
Trekking Day 10: Descend from Pheriche- Namche Bazaar (3450m)
EBC Trek Distance: 13-15km (7-8 hours)
Where to Stay in Namche Bazaar: Everest Inn
Although you’re covering more distance, the fact that you’re descending improves your body conditioning and allows you to go at a quicker pace. At this point, I still couldn’t eat anything but I was trooping on.
Due to the fact that I was still ill, I was going at an ultra-slow pace. I felt bad for Tom and my guide who had to put up with me but I couldn’t push my body to go any faster.
It was dark by the time we got to Namche Bazaar and although I was happy we made it, I was pretty gutted that I couldn’t have a celebratory beer or meal. I went straight to bed while Tom ventured out for a much-deserved pizza and beer with friends we met along the way.
While you’re in Namche, don’t forget to drop by the highest Irish pub in the world as a way to commemorate your trek. You can also have a pint or two in Liquid Bar as you revel amongst other excited travelers.
Trekking Day 11: Descend from Namche Bazaar – Lukla (2800m)
EBC Trek Distance: 16km (6-8 hours)
Where to Stay in Lukla: Everest Inn: Shangrila Hotel
I woke up today feeling amazing after spending a good 12 hours sleeping. I even managed to take in a few spoonfuls of porridge and toast. It’s amazing how your body just instantly feels better as soon as you give it food. The lower we got, the better I felt.
One thing that stuck with us was how steep some of the trails were. As we were going down, Tom and I looked at each other in disbelief as we silently ask ourselves how on earth we climbed up those steep hills.
We were also really glad that we went in the beginning of March as the season wasn’t in full swing yet. As we made our way down, we ran into loads of tourists heading up which made it difficult to fully enjoy and take in the scenery.
Thankfully as I was feeling much better and I was able to keep up with Tom this day as it’s no fun having a sick slowpoke during long treks. By the time we got to Lukla, I was starving and happily devoured some chicken and fries. To avoid any complications, throughout the trek, Tom and I did not eat meat or drink alcohol so the added protein was a big bonus.
At this point, we were just itching to get back to Kathmandu and the thought of having a warm shower and clean clothes. Never the less, it was fun hanging out in the dining room of our tea house recounting interesting parts of the trail with fellow travelers.
Trekking Day 12: Lukla- Kathmandu
Depending on what time your flight is, we recommend going to the airport as early as possible as the airport is pretty chaotic. Due to the size of the airplanes and the airport, the schedule of the airplanes are pretty inconsistent so your best chance is to get a morning flight as the weather tends to be more temperamental in the afternoons.
Overall, it has been one of the most challenging yet incredible experiences that Tom and I have ever done. Whilst a lot of people say that the trek was fairly easy, combined with the cold and the altitude, it was still a pretty big feat. (especially for clutz like me!) Trail wise, the trek itself wasn’t that difficult. If you’re used to walking for 8-9 hours a day for long periods of time, you’re most likely to be okay.
As I write this post, I honestly still can’t believe that we got to experience what I could only call a trip of a lifetime. Although things didn’t go exactly as planned and we were exhausted by the end, we had so many incredible experiences throughout the trip that I know we would never forget.
Psst...Want in on a Secret? 🤫
We've scoured the internet for the best ALL-AROUND travel shoe and Tropicfeel wins by far. We've taken ours through rivers, jungles, and cities and they're still alive and kickin'. Check them out below.
There are two main seasons when it comes to trekking Everest Basecamp. The pre-monsoon which is from March, April, and May and the post-monsoon which starts late September-December. You can also trek to Everest Basecamp during the months of January to February but expect colder temperatures.
We began our trek on the first week of March and although the weather was colder, there were fewer people on the trails. We also experienced snow the higher up we got so whatever you do, make sure you have a solid sleeping bag and a jacket to keep you warm!
When we were there, temperatures averaged from anything from 10°c to -20°c. Coming from the Philippines where the average temperature is always in the 30’s, the cold definitely got to me pretty bad!
Explore Himalaya Trekking Company Review
Established in 1997, Explore Himalaya has been organizing tours for travelers for more than a decade now. Everyone in their team was a pleasure to deal with. For me though, the bit I appreciated the most was after hearing that I had fallen ill, they kept close contact with our guide to ensure that I was okay. They assured me that if needed, medical help was available for me, providing me with some much-needed comfort throughout the trek.
Everything from our hotels, our guide, local transport, to medical assistance was provided during our entire trip making it as hassle-free as possible.
When we were there, we meet a few Danish travelers who have been exploring the Himalayan region for the last 7 years and each time used the services of Explore Himalaya which is a testament to how efficient their entire team is.
Update: Since the time of this review, we’ve since set over 60 people to go on adventures with Explore Himalaya. If you do contact them, please tell them that Tom and Anna from Adventure in You sent you to get the best possible deal!
Explore Himalaya is a fantastic Nepali owned company whose dedication to helping you go on safe adventures is unparalleled. They go above and beyond to help you out and are a very reputable company in Nepal. They have an excellent track record and have well-trained, knowledgeable guides.
Right, now here comes the big question! Surprisingly, the average price for a trip up to Everest Basecamp can vary greatly. You can get quoted anything from $1500- $5000 per person, depending on the company. When planning a trek to Everest Basecamp, here are a few questions you want to consider.
When are you going? Trekking during off-peak season will be cheaper than the peak season. How long is your trip? Are you doing the standard 12-day trek or are you adding sights like Gokyo Lake or the Chola Pass which brings it up to 16 days? What type of trek will you do? Guide only, independent trekking, or an all-inclusive package deal?
Explore Himalaya EBC Trek Cost
After you’ve decided on these points, you can then find the best way to go about planning your trek. Since we were collaborating with Explore Himalaya, they also extended an exclusive discount to Adventure in You readers which you can get when you inquire below.
Accommodation during the trek in tea houses (standard rooms non-attached bathrooms)
Kathmandu-Lukla-Kathmandu airfare
English speaking local expert guide, porters during the trek
Sagarmatha National park fees
Trekkers’ Information Management System fees(TIMS)
3 nights’ accommodation at 3-star Hotel in Kathmandu on twin sharing with breakfast
Airport transfers with escorts
Sightseeing tour in Kathmandu with and entry fees
The only thing we paid for was our meals. Per day, we estimated that we spend $30-40 between the both of us. Considering that everything was organized for us from start to finish. It also gave us loads of peace of mind that if anything did happen, there was a team to help us arrange everything.
Some cheaper tours run for around $900 but I would be cautious with this as they usually involve putting you in with a large group which may cause complications later on (not enough rooms in lodges, walking at a different pace, waiting for other members, etc.)
Also whatever you do, make sure you get written information on what exactly is included in your trip. Some will quote you lower prices but you will still have to pay for your trekking fees and flights.
Everest Basecamp Independent Trekking Cost
If you’re trekking independently without a porter, you’re looking at a budget of around $600-700 per person depending on your travel style. If you want to do it yourself but hire a local guide, you should be ready to shell out around $25-30 a day ($360 for 12 days) and around $15-20 a day ($240 for 12 days).
These fees will be on top of your flights, permits, and food expenses. This would bring your total cost to about $900-1000 per person.
Editor’s Note: Remember, whether you’re trekking with an established company or independently, getting a reputable travel insuranceis a MUST.
Overall Thoughts on our Trek to EBC with Explore Himalaya
Overall, it was an incredible experience. The incredible scenery, the people we met along the way, and the challenge of conquering the cold and the trails is something that we will always remember.
Brought together by a love for travel and adventure, throughout our trek, we saw a variety of people from all walks of life try out their luck as they conquer one of the most iconic and beautiful treks in the world.
Explore Himalaya went above and beyond to organize everything for us, making sure that we got up and down the mountain safely. If you want to go on an epic adventure, but want the logistics of it all done for you, I highly recommend you contact them.


What an experience! Love all the detailed and super useful tips… Thanks
We’ve wanted to do this trek for so long, but I’m really intimated by the altitude – and those tiny planes!